Getting a new camera is always exciting, but then learning how to use it is a whole different story.
After years of shooting with my Sony a6600, I finally got my hands on the Fujifilm X-T50. And I couldn’t wait to see how it felt in action. As a long-time photographer, I didn’t consider how difficult it might be to use at first.
In this post, I’m sharing my first impressions of the Fujifilm X-T50, my gradual process of learning how to shoot with the camera, and how it changed my photography.
My first impressions of the Fujifilm X-T50
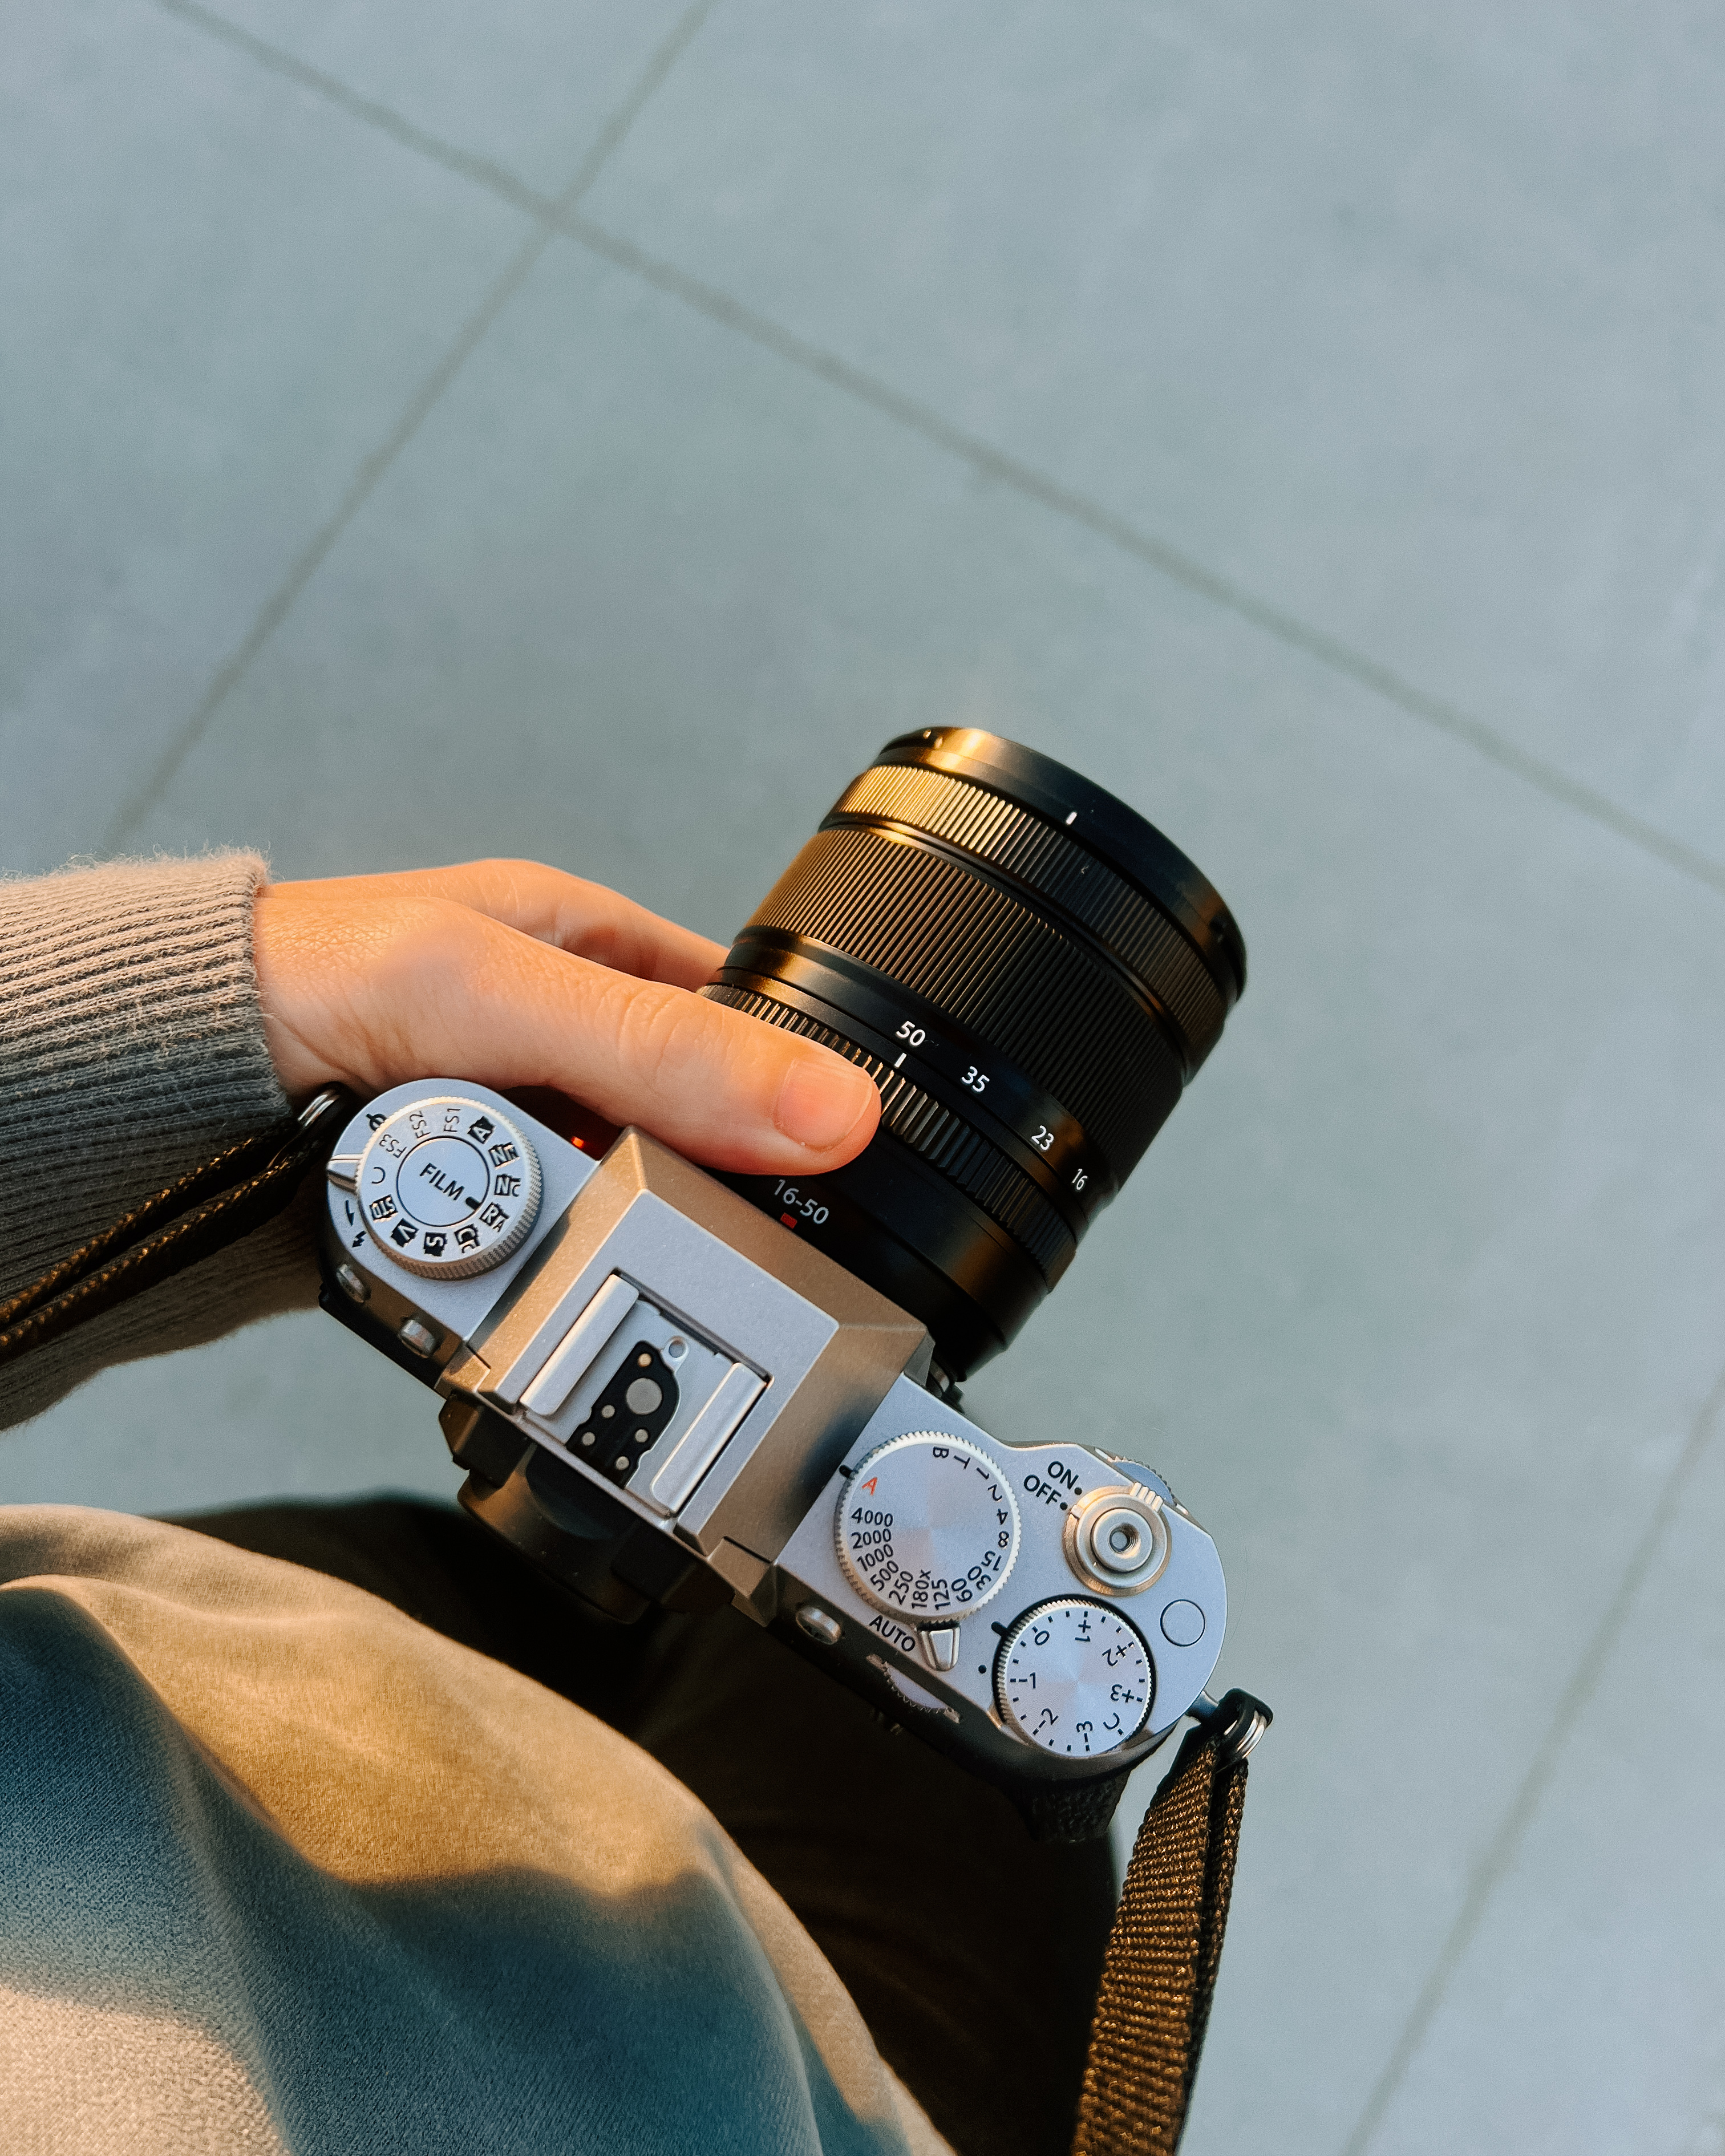
First things first, the camera itself is beautiful. Truly, its design is a work of art.
I chose the silver camera because it has a nostalgic, old-film camera feel, which was exactly the vibe I was aiming for—perhaps a bit cheesy, but I love it.
Other than its design, one of the first things you might notice is how small the camera is (one of the reasons I chose the X-T50 over the X-T5). As someone with smaller hands, it’s perfect for me! However, if you have large hands, the controls might be too small for you (try getting the memory card out with large hands, woof).
When I first got my hands on the camera I wanted to immediately start shooting. Instead, I started by configuring all of my settings.
Unlike previous cameras I’ve owned, the X-T50 does not come with a paper manual. The manual is available online here. I am a fan. Less paper is wasted and it’s easy to look up specific questions.
Rather than flipping through the online manual, I turned to YouTube for setup videos on the Fujifilm X-T50. I found this video by Kyler Steele particularly straightforward, and I also appreciated the tips from Pal2tech’s video.
This process helped me familiarize myself with the Fujifilm menu system and adjust the settings to suit my needs. These videos also showed me how to quickly program my dials to adjust the aperture, shutter speed, and ISO and set up the Q menu for easy access on the back of the camera.
Recommend read: Why I Got a Fujifilm X-T50 (And Not an X-T5)
Using the X-T50
Shooting with the X-T50 is an experience.
Learning to use a new brand of camera that’s so different from any I’ve used before has been a bit challenging.
The XT50 feels highly customizable and provides a lot of control to the user. While this is great, it also felt overwhelming at first.
Rather than get frustrated because everything felt confusing, I took things slow and focused on one thing at a time.
I started by focusing on film simulations only, then experimenting with exposure compensation, and finally getting comfortable using different shooting modes.
I’ll walk you through this process in the sections below.
Focusing on Film Simulations
Since the film simulations were a major reason I chose the X-T50, I began by exploring them exclusively.
Yup, I shot in full automatic mode and only adjusted the film simulations. They were what I was most excited to experiment with. So that’s where I started.

The X-T50 features a film simulation dial, which some veteran Fujifilm users dislike. However, as a Fujifilm newbie, I found it incredibly helpful for quickly flipping through simulations and seeing their effects in real time.
Rather than researching simulations beforehand, I tested them in different situations to form my own opinions. You can see a side-by-side comparison of 10 of 21 film simulations below.
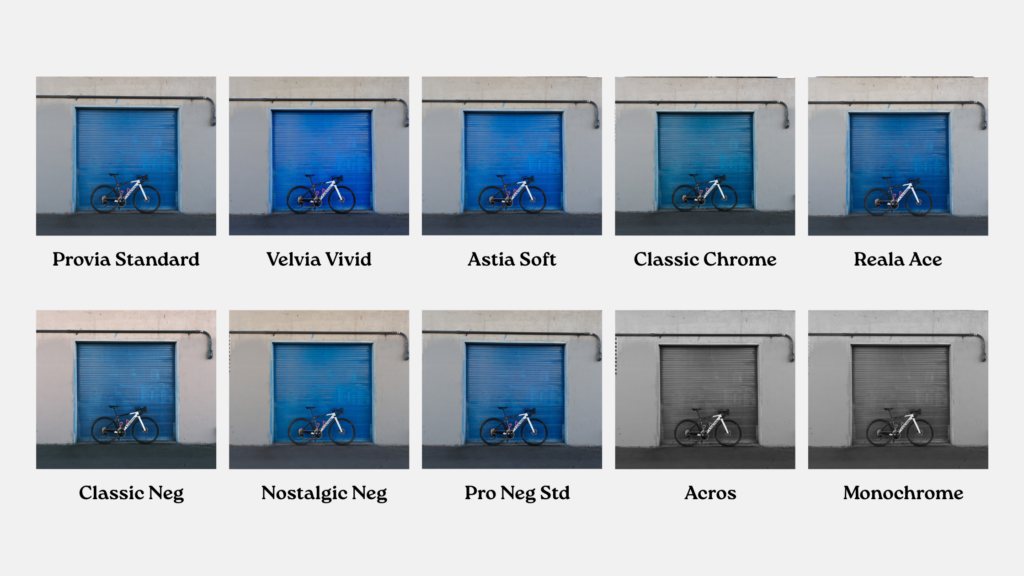
After gaining some experience, I looked up Fujifilm’s descriptions to better understand each simulation’s intended use. This article was particularly helpful.
After two months of shooting, my go-to simulations are Provia Standard and Acros. However, I still experiment in different environments to see how various simulations impact color and tone.

At this point, I haven’t explored Fujifilm recipes yet. It was important to me to focus on understanding the camera’s film simulations and other customizable features first.
But I’m already feeling excited about experimenting with them. Images shot in good light look great straight out of the camera on the Fujifilm X-T50. Which has already reduced my need for long edits!
Using Exposure Compensation
There is an exposure compensation dial on the XT50 that allows you to tell your camera to make your images brighter (a positive number) or darker (a negative number).
When you adjust your exposure compensation in automatic mode, the camera will either change your aperture, shutter speed, or ISO to brighten or darken your image.
After feeling somewhat comfortable in automatic mode, I decided to mess with the exposure compensation dial and see how changing it impacted photos. Surprisingly, I found that the XT50 was pretty smart and properly exposed most images.

I’m unsure if the LCD screen displays the image differently than the final product. As someone who has shot exclusively with the LCD screen on my Sony, I did find myself using the viewfinder on my XT50 in bright environments because it was hard to see the image, I was taking on screen. And I couldn’t tell if that was impacting how I adjusted my EC. Which is interesting.
There were some situations where I found the camera had a better exposure than me when using exposure compensation and some where I liked my adjustment better. I found that the XT50 sometimes “overcooks” images (makes them more saturated than I’d like) and tried experimenting with EC for that.

Overall, this helped me make super simple adjustments and I found less was more. Idk if my opinion on that will change as time goes on.
Using Shooting Modes
I’m used to having a shooting mode dial on my camera. I’ve literally never had a camera without one.
And well, the Fujifilm X-T50 doesn’t have a shooting mode dial. There is a dial for film simulations, shutter speed, and exposure compensation. But no shooting mode dial. While the dials are aesthetically pleasing, they’re kind of confusing when you’re first getting used to them!
When using a camera with a shooting mode dial, all you have to do is turn your dial to the mode you’d like to shoot in, and then, you’ll be shooting in that mode. On the Fujifilm X-T50, it’s a little more complicated. Rather than flipping to a different mode on a shooting dial, you have to get out of automatic mode (a flip switch on the top of the camera) move the shutter speed dial, and adjust a setting on your camera lens to get into different modes.
In the YouTube video by Kyler Steele I included above, he starts walking you through the different shooting modes at 27:06. Watch his video if you’re confused about how to get the Fujifilm X-T50 into automatic mode, aperture priority mode, shutter priority mode, and manual mode.
Fortunately, the XT50 displays what shooting mode you’re currently in on the bottom left of your screen. It will display AUTO if you’re in automatic mode, S if you’re in shutter priority mode, A if you’re in aperture priority, and an M if you’re in manual.
Once you understand how it works, it’s pretty simple but even for me, an experienced photographer, my brain was in a pretzel trying to figure it out and make sure I had all the right things adjusted to shoot in shutter priority or manual.
Like when I swore, I was in manual mode but the little M wasn’t appearing on the bottom left of the screen and I couldn’t figure out why my exposure meter was at 0 regardless of what I adjusted. Well, it took me a while, but I realized that my ISO was on auto mode which was selected if I scrolled too far on my ISO dial accidentally.
That one took a bit for me to figure out, but now I know! And now I can see why an ISO dial would be beneficial over a film simulation dial…
Learning to use the different shooting modes was a humbling experience for me and one that I could only learn through messing it up a bunch and solving the problem through Googling.
Problem Solving with the XT50
Speaking of problem-solving, I find it’s good to be a natural problem-solver if you’re interested in buying this camera or getting into photography in general. That is, when a problem arises, are you okay figuring out the solution to that problem quickly and on your own?

Personally, I find it fun to be challenged (but also frustrating at times too, I won’t lie). If there is a problem, I like to find a way around it. Which is why I like things like learning photography, running this website, and coding in statistical software.
I’ve already encountered a few moments with this camera that made me want to pull my hair out. But fortunately, we live in the era of Google.
Here’s an example of a quick problem I had to solve:
Problem: My flash won’t work on the Fujifilm X-T50, despite being open.
Solution: You need to use a mechanical shutter, not an electronic shutter (my preference for silence).
This was one of the first hurdles I faced when setting up my camera. After following the setup videos and adjusting settings based on my preferences, I attempted to use the flash, but it wouldn’t fire.
A quick Google search led me to a comment where someone mentioned that the selected shutter type could prevent the flash from firing. I tested it, and sure enough, the issue was resolved.
Now, I’ve added this setting to my Q menu for easy access, allowing me to switch between shutter types as needed. While I don’t often use a flash, I now know how to quickly adjust when I do.
As a self-taught photographer, I’ve learned most things through Google and YouTube. If you’re also self-taught, you might encounter similar challenges while learning this camera.
While it can be frustrating at times, problem-solving these issues is actually quite simple.
How the XT50 has changed my photography
I don’t know what it is, but the X-T50 makes me feel like a photographer.
I’ve been taking pictures off and on for two decades and I haven’t had that experience with a camera before. Yes, the Canon 5D I used to shoot on felt like a nice camera and my Sony a6600 feels easy to use, but neither of them made me feel like I was a photographer.
The XT50 has also helped improve and expedite my editing process in many ways.
Firstly, it has helped me get away from overediting images. This is something the Fujifilm Instax Mini Evo helped me change subtly too. It made me want to stop changing colors so drastically and make them look more realistic.
The XT50 has amplified this feeling and made me curious about how I can nail the image in the camera so that I don’t have to edit much after it’s taken. Now, I try and edit images as minimally as I can in Lightroom. I know they are not perfect but I’ll get better the more I practice at it.

Secondly, it’s sped up my editing process. I have my camera set to record a JPG and raw image.
I have sent many JPGs directly from my camera to my phone and shared them with minor touch-ups in the iPhotos app. Which is crazy to me, as someone who has always used Lightroom religiously.
It helps that images look pretty good straight out of the camera if shot in good light on the XT50 too.

Despite the challenge, it has been fun and rewarding to learn how to use the Fujifilm X-T50. Coming off a year of struggling to want to use my Sony camera, this has been a breath of fresh air.
To help myself commit to using it consistently, I began a 52-week photo challenge on January 1, 2025, to help myself stay consistent with the camera, and it has been working!
Recommended read: What is a 365 day photo project and is it right for you?
Closing Remarks
The Fujifilm XT50 isn’t a perfect camera, it can sometimes feel clunky to use, and it’s not a camera I would recommend for brand-new photographers. It also might not be the best camera for people with large hands/fingers because it has small controls and a tight memory card slot! But it is a fun portable camera and a great first Fujifilm for those with some photography experience who shoot for fun!
Its highly customizable features felt a bit overwhelming at first, but focusing on learning one thing at a time has helped me get more familiar with this camera.
I have no shame in admitting that I started using this camera on automatic mode to get familiar with the film simulations, before beginning to adjust the exposure compensation, and then finally venturing into using different shooting modes.
It has been a fun, yet humbling experience to learn how to shoot a new camera brand. And I’m excited to keep using the camera and to add new lenses to my line-up in the future!
What else would you like to know about this camera?